Coconut Milk Leave In Conditioner: Unbelievably simple
This leave in conditioner is supposed to add shine making your hair look healthier by nourishing your hair with its proteins, fat content and vitamin E that it contains. I have currently used it a few times and have found my hair having a beautiful glow and lovely smooth feel. According to other bloggers it also helps restore thinning damaged hair and acts as a detangler unfortunately I have not used it long enough to see those effects but will definitely update this blog post after using it for longer. For now though I do notice how nourished it makes my hair look and feel.
What you need:
Distilled water
Coconut milk
Spray bottle
Container that can be place in freezer
What to do:
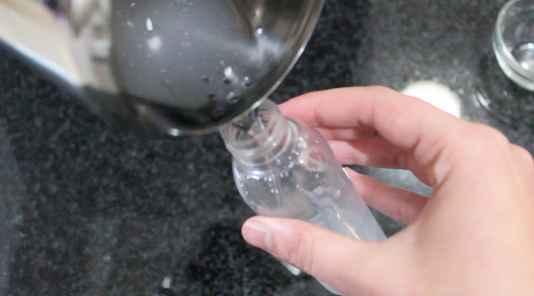
Place 1/4 cup of distilled water in the spray bottle.
Then place 1 tablespoon of coconut milk in spray bottle.
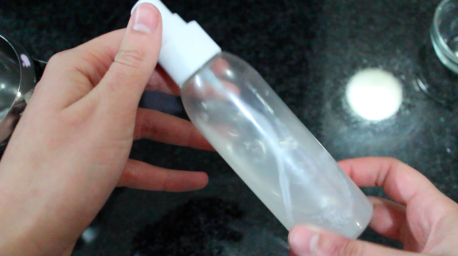
Place lid on spray bottle then shake.
And there we have it now you can spray it on dry or wet hair.
Storing:
This recipe allows you to make a small amount of the product as natural products go off really fast.You can now place the remaining coconut milk in the freezable container and pop it in the freezer for later or use it in cooking.The distilled water can be put in the fridge along with the spray when no in use.
This blog post will show you two simple and easy to make healthy snacks.The snacks can become a dinner or lunch meal by increasing the quantity.Snacks are important to have during the day as they help sustain your energy and prevent you from binge eating.Snacks should be small and usually between 300-500 kilojoules.
1.Marrow Stir-fry:
This stir-fry is filling and keeps you full for a while.
total time takes to complete: 5-6 minutes.
What you need:
shooter glass of water.
Barbecue spice.
Paprika spice.
1 clove of crushed garlic.
Salt.
Butter/olive oil/ sunflower oil etc. (oil of your choice).
3 marrows.
Chickpeas and or feta (optional)
What to do:
Wash the marrows and cut off the top end and bottom ends.
Using a vegetable slicer/peeler peel the marrows into strips.
Put the marrows aside for now, then in a pan place the crushed garlic ,1/2 a teaspoon of butter/oil of choice and a pinch of salt in the pan.
Place the pan on the stove on a medium to high heat.
Stir butter until it has completely melted and begins to sizzle.
Now add the marrow strips and toss/stir to get the butter to evenly distribute.
After 30 seconds add 1 teaspoon of paprika spice and 1 teaspoon of barbecue spice (sprinkle over evenly).
Toss/stir for 30 seconds again but allow breaks in-between the tossing/stirring so that it can cook a bit.
Put the stove on a low heat and place 1/2 shooter glass of water in the pan.Allow water to cook away before tossing/stirring again (1 minute).
Constantly taste the food to see if you would like to add more spice, because everyone is different when it comes to amount of flavour is in their food. Add another 1/2 teaspoon of butter and the rest of the water and cook for one more minute.
Now that its ready you can add some chickpeas and or feta if you would like.
ENJOY.
2. Rice paper rolls:
These are light on the stomach and have a fresh taste .I love them because they are simple and you can add anything to them. I have had some of my friends taste the rice paper and not everyones a fan, I think its because not a lot of people have ever had it before so its new to their pallets.
total time takes to complete: under 5 minutes serving size: 1-2 rice paper rolls
What you need:
Rice paper.
Chopped vegetables of choice.
Cheeses of your choice.
You can also add sauces but sauces aren’t that healthy.
leftover meats can also be add.
What to do:
Place the rice paper in a plate ( a slightly shallow plate) and pour over warm to hot water over the rice paper (takes about 5 seconds for it to cook).
While the rice paper is soaking chop up some vegetables. I used: cucumber, watercress, rocket, spinach, mushrooms, carrots, feta and white gouda.
Now on a new plate place a paper towel on the plate.
Carefully remove the delicate rice paper onto the paper towel.
Take another piece of paper towel to dab the top exposed part of the rice paper.
Near to one end of the rice paper place the vegetables in a narrow line.
Fold the top and bottom of the rice paper over the vegetables.
Then the start folding the side closest to the vegetables. when folding try and tuck in as you go along so it can get tighter.
Once done folding you can enjoy.
STILL NOT QUITE SURE WHAT TO DO CHECK OUT THE VIDEO OR LEAVE A COMMENT. 🙂
Well I’m sure that anyone that wears makeup worries about the makeup fading or melting off their face.Yes we all know that moment when you look in the mirror after you had just applied your makeup then, two hours later you look in the mirror again and are shocked to see your eyeshadow hanging off your eyelids.This setting spray is easy to make, natural and surprisingly light on the face but does it work?
What you need
A spray bottle.
aloe vera gel (99-100% pure).
Warm water.
What to do:
Place 1/4 of the spray bottle with aloe vera gel.
place the rest of the bottle with warm water (3/4).
shake well and spray after you apply your makeup or before and after.
The test
I sprayed the setting spray ,applied makeup on then sprayed again and left the make up on for 3 hours to test and my verdict is… it does work. I will definitely test it for longer period next time.This setting spray is light on the face and has a slight fresh smell from the aloe vera gel.
Eyebrow Thickener
Recently having thick perfect eyebrows have became the trend by being put in songs, vines etc. Making many insecure. So I decided to try out a DIY eyebrow thickener serum that stated it should show results in two weeks and it did. In fact the results were not that bad for the amount of time it said it would work my eyebrows did appear thicker. So this DIY idea is definitely a DI-do. Wanna know how to make this two ingredient serum?
What you need:
Castor oil.
Rosemary essential oil.
A mascara container or a container with a rollie ball on top.
Great for breakfast , lunch or a snack. This doesn’t have a smooth texture but still has a nice taste. It isn’t sweet as there is no sugar but this can be added if you are a bit of a sweet tooth like myself. What you need:
• 1 cup of uncooked oats
• 2 bananas
• 2 eggs
Options for the sweet tooth:
• Honey
• Choc-chips
• Sugar (fructose, stevia etc.) What to do:
1. Place all ingredients in a blender excluding choc-chips if adding.
2. Blend until turns into a liquid batter and there are no banana chunks.
3. Now add choc-chips and turn on blender for 1 second.
4. Put stove on a low to medium heat and wait for pan to heat up.(low to medium heat allows flap jacks to cook through without burning.)
5. Pour blobs of batter in pan to desired size.
6. Cook until light to medium brown on both sides.
7. Makes: 6/7 depending on size of flap jack.
Great with a honey yogurt cinnamon sauce for on the side. How to make it :
• 2 tablespoons plain yogurt.
• 1 teaspoon of honey.
• And a tip of a teaspoon of cinnamon.
• Mix together ingredients.
• Now it’s ready to dip and enjoy.
Not only does it taste great but this mask works wonders for shrinking pores and reducing redness on your face. It is important to note that you will only notice a slight difference with one application but with continuous use the difference will definitely be evident.
Ingredients: for multiple applications
1 tablespoons of full cream yogurt.
1 tablespoon of honey.
1 teaspoon of lemon.
1 teaspoon of cinnamon. (optional)
Note: Ingredients will need to be adjusted drastically to make it into a single application.
What to do:
Add all ingredients together.
Mix until all ingredients have blended together.
Apply to face in small circular motions.
Leave on for 20 minutes.
Remove with warm damp cloth.
Repeat 3 times a week.
Add leftovers in a airtight container and place in fridge use within -+7 days.
How it works:
Cinnamon: acts as a facial scrub that will remove dead skin.
Honey: Acts as an exfoliator and also aids in clearing blemishes.
Yogurt: Dissolves dead skin and soothes redness helping remove and reduce it also assists in shrinking pores.
Lemon: Help reduce appearance of facial scars and marks.
This natural lip balm is outrageously simple to make the only problem would be finding where to purchase beeswax. Making your own lip balm is great because you know exactly what ingredients go into the balm and Most of the ingredients for this recipe should be in majority of people’s cupboards. I am extremely happy with this lip balm as it is extremely nourishing and will quickly get those chapped lips back to its soft plump old self.
Just a heads up:
The beeswax has a very prominent smell and is hard to remove, so the final product will still have a beeswax smell. I haven’t tried this yet but I think that by adding either more essential oils or vanilla might cover the smell.
What you need:
15 grams beeswax
10 grams castor oil or olive oil
47 grams coconut oil
22 grams of sunflower oil
+/-2 tablespoon (depending on intensity of vanilla flavor wanted can add more)of vanilla extract/ 25 drops vanilla absolute oil(preferred).
Optional 1 table spoon raw honey.
Lip balm container and container for leftovers.
What to do:
Place all ingredients except vanilla extract in a metal/glass bowl over boiling water on stove to melt and mix ingredients.
once everything has melted and mixed Add vanilla extract.
once everything is mixed remove from heat and place in container, wait for it to cool and solidify then it’s ready to use.
Extras:
Can change vanilla extract by adding other essential oils instead.
Can add food colouring to take the drab original colour to a fab colour of your choice.
Wondering through my small garden I stumbled across a branch and thought it would be a great idea to turn this into a chalk black necklace holder. This project was simple and added a great piece of décor to my room and finally a decent place to hang my few necklaces so they don’t get tangled.
What you need:
A branch that is not weak and or brittle.
Black chalk paint/ preferred colour/plain.
String/chain/rope/nails.
Newspaper to prevent a mess.
What to do:
Wipe the branch with a wet cloth/ rinse in bath or sink etc.
Leave the branch to dry for 1 or 2 hours.
Apply one layer of chalk paint and wait for it to dry.
Once dry add the second coat using a sponge.5. Once the second coat is dry you can either decide to hang it on the wall with the string, rope or chain by either tying it around the branch or stapling the string to the back. Another option is placing nails in the wall and place the branch on the nails.
6. Let it sit pretty on the wall and hang your gorgeous necklaces.
This smoothie will definitely quench your chocolate, sweet craving. With every sip you get the chocolate flavor, then a hint of peanut butter then banana it just keeps making you want another sip trying to cling onto one of the flavors.
What you need:
1 frozen banana.
1 teaspoon of peanut butter.
15ml of protein powder. (I use nature’s choice whey concentrate.)
This list will consist of foods readily available and cost effective to continue using on a regular basis.
Poultry: hair is made of mainly protein by eating poultry you are giving your hair the building blocks to grow .there are things in poultry like zinc, iron and vitamin B which assist in its growth.
Sweet potatoes: protects and produces oil sustain your scalp.
Eggs: source of protein also has four key minerals: zinc, selenium, sulfur, and iron. Iron is especially important, because it helps cells carry oxygen to the hair follicles.
Spinach: contains iron, beta carotene, folate, and vitamin C which makes hair healthy and produce oils.
Sunflower seeds: enhances blood flow to scalp which in turn increases growth.
Avocado/pumpkin seeds: omega-3 keep hair hydrated and in turn creates growth.


