Dark Chocolate Peanut butter Protein Delight

This smoothie recipe was made completely from scratch by myself. It is super simple like all my other recipes. This is a great meal if you are on a healthy lifestyle or diet (such as a high protein diet) and you have a sweet tooth , as this will keep those cravings at bay. I showed my friend this recipe and she is absolutely obsessed with it and can not go a day without it. So after reading this introduction you are interested in making this smoothie continue reading below.

What you need:

  • 1 cup of ice or more
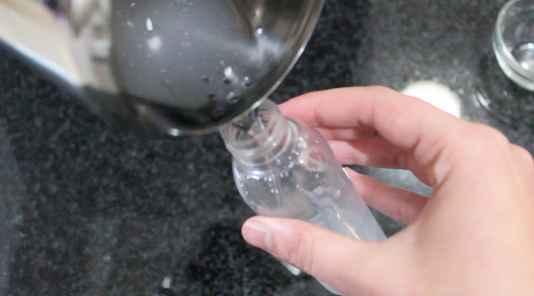
  • Almond milk or other milk
  • 2 Blocks of dark chocolate
  • Cocoa powder
  • Peanut butter or a banana frozen ( best results if in freezer for 30 minutes) use only one or the other.
  • Blender
  • Microwaveable cup
  • Protein powder ( I used nature choice whey protein concentrate)

What to do:

  1. In blender place ice and 5 tablespoons of almond milk and banana if using.
  2. In cup place 2 blocks of dark chocolate, 2 teaspoon of cocoa powder, 2 tablespoons of almond milk and a teaspoon of peanut butter if using.
  3. Place cup with ingredients in microwave for 30 seconds or until melted.
  4. Stir melted ingredients in cup and pour into blender.
  5. Blend ingredients until everything is incorporated.
  6. Then place a serving of protein powder into blender. Mine was 3 tablespoons.
  7. Blend again until all powder is incorporated.
  8. Enjoy.

screen-shot-2016-10-18-at-4-52-54-pm

Coconut Milk Leave In Conditioner

Coconut Milk Leave In Conditioner: Unbelievably simpleĀ 

This leave in conditioner is supposed to add shine making your hair look healthier by nourishing your hair with its proteins, fat content and vitamin E that it contains. I have currently used it a few times and have found my hair having a beautiful glow and lovely smooth feel. According to other bloggers it also helps restore thinning damaged hair and acts as a detangler unfortunately I have not used it long enough to see those effects but will definitely update this blog post after using it for longer. For now though I do notice how nourished it makes my hair look and feel.

What you need:

  • Distilled water
  • Coconut milk
  • Spray bottle
  • Container that can be place in freezer

What to do:

  1. Place 1/4 cup of distilled water in the spray bottle.Screen Shot 2016-05-10 at 6.19.18 AM.png
  2. Then place 1 tablespoon of coconut milk in spray bottle.
  3. Place lid on spray bottle then shake.Screen Shot 2016-05-07 at 1.22.40 PM
  4. And there we have it now you can spray it on dry or wet hair.Screen Shot 2016-05-07 at 1.25.05 PM.png


Storing:
This recipe allows you to make a small amount of the product as natural products go off really fast.You can now place the remaining coconut milk in the freezable container and pop it in the freezer for later or use it in cooking.The distilled water can be put in the fridge along with the spray when no in use.

My Take On A Healthy Omelette

Change up your breakfast omelette
Lately I have been obsessed with eating omelettes for breakfast and I love taking new spins on them by adding new and interesting fillings. Omelettes can seem scary to many but are actually really easy to make and turn if you try my trick which will save you from turning your omelette into scrambled eggs. To see my trick watch the youtube video at the end of the post.

What you need:

  • 2eggs
  • milk
  • butter
  • garlic
  • asparagus
  • red pepper
  • feta
  • olives

What to do:

  1. Wash the vegetables and chop the red pepper into small pieces.Screen Shot 2016-02-09 at 9.20.34 PM.png
  2. Place half a teaspoon of butter in a pan and sautƩ the vegetables until they are semi-cooked or cooked to the consistency you like.Screen Shot 2016-02-09 at 9.20.59 PM
  3. place the vegetables aside in a plate or bowl.
  4. Now place in the pan 1 teaspoon of butter or take one large piece of butter rub it around the pan until the surface of the pan is covered in butter as seen in the video.
  5. Mix together the 2 eggs and milk( pour desired amount)Screen Shot 2016-02-09 at 9.21.15 PM
  6. Once butter heats up and starts sizzling add a pinch of garlic, give it a quick stir.
  7. Immediately after stirring add the the egg mixture.
  8. While the egg mixture cooks take a spatula and make sure the sides don’t stick.Screen Shot 2016-02-09 at 9.21.28 PM
  9. After a minute lightly shake the pan forwards and backwards to see if it slides.
    If it slides its time to turn. see video for help on turning(hack).
  10. Once flipped add to one half of the omelette the vegetables some feta and olives.
    after 1 minute fold and place on a plate and enjoy.Screen Shot 2016-02-09 at 9.21.51 PM


Foods to protect and repair your liver for the new year.

Foods to protect and repair your liver for the new year.

The liver is an organ that helps with processes such as absorption, digestion and excretion. It has many functions that are essential for our well-being and survival e.g. removing harmful substances (alcohol and drugs) from the body and resisting infection. That is why it is crucial to take care of our liver. We can do this by implementing certain foods (mentioned below) to our diet and taking certain supplements/vitamins to maintain and speed up the healing process. So why not add a few extras to you diet to help you(and your liver) survive a crazy new years party!

Foods to implement:

Garlic: It activates enzymes that breakdown and remove toxic waste.

fresh-garlic
Green tea: Prevents waste from gathering up in the liver as it removes liver fat where toxins would accumulate.

Green-Tea
Spinach: Contain compounds that cleanse the liver and remove metals that the body does not need.

14_48_19_671_Spinach_Perpetual_Medium_
Avocados: safeguard it from toxic strain.

AVO PULP 1KG-500x500
Turmeric: This super spice is amazing with repairing and preventing damage to the liver by promoting additional bile that will increase removal of toxic waste.

Just as an extra note this will not immediately or completely cure or fix the damage done from excessive drinking or damage done to the liver but it will help repair it to an extent over a long period of implementing food such as these regularly.

NewYearsEve

sources:

http://www.naturalnews.com/035946_liver_cleanse_foods.html#

http://www.stanfordchildrens.org/en/topic/default?id=anatomy-and-function-of-the-liver-90-P03069

http://foodmatters.tv/articles-1/7-foods-to-naturally-cleanse-your-liver

2 Simple To Make Healthy Snacks

2 Simple Healthy Snacks

This blog post will show you two simple and easy to make healthy snacks.The snacks can become a dinner or lunch meal by increasing the quantity.Snacks are important to have during the day as they help sustain your energy and prevent you from binge eating.Snacks should be small and usually between 300-500 kilojoules.

1.Marrow Stir-fry:
This stir-fry is filling and keeps you full for a while.

Screen Shot 2015-10-04 at 4.53.43 PM

total time takes to complete: 5-6 minutes.

What you need:

  • shooter glass of water.
  • Barbecue spice.
  • Paprika spice.
  • 1 clove of crushed garlic.
  • Salt.
  • Butter/olive oil/ sunflower oil etc. (oil of your choice).
  • 3 marrows.
  • Chickpeas and or feta (optional)

What to do:

  1. Wash the marrows and cut off the top end and bottom ends.Screen Shot 2015-10-05 at 4.48.19 PM
  2. Using a vegetable slicer/peeler peel the marrows into strips.Screen Shot 2015-10-05 at 4.49.33 PM
  3. Put the marrows aside for now, then in a pan place the crushed garlic ,1/2 a teaspoon of butter/oil of choice and a pinch of salt in the pan.Screen Shot 2015-10-05 at 4.50.19 PM
  4. Place the pan on the stove on a medium to high heat.
    Stir butter until it has completely melted and begins to sizzle.
  5. Now add the marrow strips and toss/stir to get the butter to evenly distribute.Screen Shot 2015-10-05 at 4.51.35 PM
  6. After 30 seconds add 1 teaspoon of paprika spice and 1 teaspoon of barbecue spice (sprinkle over evenly).Screen Shot 2015-10-05 at 4.52.02 PM
  7. Toss/stir for 30 seconds again but allow breaks in-between the tossing/stirring so that it can cook a bit.
  8. Put the stove on a low heat and place 1/2 shooter glass of water in the pan.Allow water to cook away before tossing/stirring again (1 minute).Screen Shot 2015-10-05 at 4.55.03 PM
  9. Constantly taste the food to see if you would like to add more spice, because everyone is different when it comes to amount of flavour is in their food. Add another 1/2 teaspoon of butter and the rest of the water and cook for one more minute.
  10. Now that its ready you can add some chickpeas and or feta if you would like.Screen Shot 2015-10-05 at 4.56.02 PM
  11. ENJOY.

2. Rice paper rolls:
These are light on the stomach and have a fresh taste .I love them because they are simple and you can add anything to them. I have had some of my friends taste the rice paper and not everyones a fan, I think its because not a lot of people have ever had it before so its new to their pallets.

Screen Shot 2015-10-05 at 4.57.03 PM

total time takes to complete: under 5 minutes
serving size: 1-2 rice paper rolls

What you need:

  • Rice paper.
  • Chopped vegetables of choice.
  • Cheeses of your choice.
  • You can also add sauces but sauces aren’t that healthy.
  • leftover meats can also be add.

What to do:

  1. Place the rice paper in a plate ( a slightly shallow plate) and pour over warm to hot water over the rice paper (takes about 5 seconds for it to cook).Screen Shot 2015-10-05 at 4.58.18 PM
  2. While the rice paper is soaking chop up some vegetables. I used: cucumber, watercress, rocket, spinach, mushrooms, carrots, feta and white gouda.Screen Shot 2015-10-04 at 4.54.50 PM
  3. Now on a new plate place a paper towel on the plate.
    Carefully remove the delicate rice paper onto the paper towel.Screen Shot 2015-10-05 at 4.59.31 PM
  4. Take another piece of paper towel to dab the top exposed part of the rice paper.Screen Shot 2015-10-05 at 5.00.13 PM
  5. Near to one end of the rice paper place the vegetables in a narrow line.Screen Shot 2015-10-05 at 5.01.26 PM
  6. Fold the top and bottom of the rice paper over the vegetables.Screen Shot 2015-10-05 at 5.01.45 PM
  7. Then the start folding the side closest to the vegetables. when folding try and tuck in as you go along so it can get tighter.Screen Shot 2015-10-05 at 5.02.02 PM
  8. Once done folding you can enjoy.Screen Shot 2015-10-04 at 4.54.26 PM

STILL NOT QUITE SURE WHAT TO DO CHECK OUT THE VIDEO OR LEAVE A COMMENT. šŸ™‚

Kitchen Hacks (part 1)

Simple Kitchen Hacks

Fridge Deodoriser :
This hack is amazing for removing odours that lurk in your fridge.Screen Shot 2015-09-07 at 6.16.46 PM

How to make it:
In a small container/shooter glass place any amount of bicarbonate of soda in the container and place the container open in the fridge. Replace the bicarb every few months.

Tip: to add a nice scent to your fridge add a few drops of essential oil to the bicarb/ in a separate container vanilla essence.

2. No More Annoying eggs shells
The most annoying thing is when you crack an egg and you accidentally manage to get piece of the shell in the yolk and it takes you 5 minutes to remove.This hack will make it an easy to remove.Screen Shot 2015-09-07 at 6.16.27 PM

What to do:
-All you need to do is wet your finger tips and then remove the shell in one go.

3. The Perfect Pick
If you always struggle picking the right avocado and then you end up moshing them trying to guess which one is ready, this hack is for you.Screen Shot 2015-09-07 at 6.16.02 PM

What To Do:
Remove the stem if the indent where you removed the stem is brown then it is overripe, if it is very light green and the stem comes off with ease then it is ripe, lastly if the stem is hard to remove it is not ripe.

Nourishing Bar To Fight Dry Skin This Winter

Nourishing coconut lotion barIMG_0930

Yip its not a cream ,oil or soapā€¦its a bar. This bar is great for nourishing the skin and rehydrating it to prevent or cure the dreaded dry winter skin. This bar is simple to make, is natural and also has many benefits for the skin. This bar has a similar effect like baby oil, it wonā€™t clean your skin but coats it in hydrating oils that will soak into your skin.

What you need:IMG_0916

  • 2/4-3/4 cups Coconut oil
  • 1/4-2/4 cups Pure beeswax
  • As many drops as desired of essential oils (optional) e.g) lavender,
    rosemary, vanilla etc.
  • 1teaspoon-1tablespoon Olive oil/ sun flower oil (optional)
  • Saucepan
  • Tin/muffin-pan/lotion mould

Note: The ingredients can be adjusted to make a softer or harder bar that can be applied much easier or harder onto the skin.Less beeswax makes the bar softer more makes it harder.

How to make it :

  1. ā€ØHeat up the saucepan.
    Add the coconut oil ,beeswax and the other oils if you decided to use them.IMG_0920
  2. Continuously mix until melted.
    Remove from heat, immediately add essential oils and mix in the essential oils(optional).IMG_0923
  3. Place the still hot liquid in a container, wait to cool or in a rush pop it in the fridge/freezer.once cooled should pop right out of the mouldĀ IMG_0933
  4. Enjoy crusty free skin.

Tips:

  1. Break the beeswax in to small chunks to allow it to melt faster.
  2. Struggling to measure out the cups? melt the beeswax/coconut oil separately, continuously pouring the liquid into the measuring cup and out until you reach desired amount.

How to use the bar:
The bar is not used in the shower/bath it is applied after you shower/bath, you apply it to your warm dried skin. The warm skin should melt or soften the bar allowing the oils to be applied to your skin. If your skin is cold warm up the bar by either rubbing it between your hands or giving it a quick blow-dry with your hairdryer.If you make it the right constancy it should apply onto the skin just fine. Cream can also be used after the bar.

Natural Makeup Setting Spray

Make up setting spray

Well I’m sure that anyone that wears makeup worries about the makeup fading or melting off their face.Yes we all know that moment when you look in the mirror after you had just applied your makeup then, two hours later you look in the mirror again and are shocked to see your eyeshadow hanging off your eyelids.This setting spray is easy to make, natural and surprisingly light on the face but does it work?

What you needIMG_0871

  • A spray bottle.
  • aloe vera gel (99-100% pure).
  • Warm water.

What to do:

  1. Place 1/4 of the spray bottle with aloe vera gel.IMG_0874
  2. place the rest of the bottle with warm water (3/4).IMG_0876
  3. shake well and spray after you apply your makeup or before and after.IMG_0879

The test

I sprayed the setting spray ,applied makeup on then sprayed again and left the make up on for 3 hours to test and my verdict is… it does work. I will definitely test it for longer period next time.This setting spray is light on the face and has a slight fresh smell from the aloe vera gel.

DIY Chalk Paint 3 Ingredients 2 Steps

How to make chalk paint
Chalk paint is a recent invention(invented 1990s) ,thats got everyone going crazy with its matte finish and full coverage this makes it perfect for creating beautiful distressed antique pieces to simple ,elegant and clean looking pieces. Painting furniture has just gotten easier because with chalk paint you don’t have to spend countless hours sanding down furniture all you need to do is wipe and apply.

IMG_0768

What you need:

  • 2 cups of paint.
  • 1/3 cup plaster of paris.
  • 2 TBsp of water.
  • Container.

What to do:

  • Mix all ingredients together.IMG_0776
  • Now your ready to paint.IMG_0779

Tip:

  • If it is to thick apply water.
  • Apply a layer of soft wax.